Creating a self-signed S/MIME certificate for Mac and iOS 5 email
Today I needed to send some passwords to someone over the internet again. The recipient recommended using PGP/GPG to send an encrypted email, but unfortunately that protocol appears to be quite a hacky hassle if you use the built-in email clients on Apple’s (and apparently Microsoft’s) platforms.
Fortunately, iOS 5 just added support for a more standard protocol called S/MIME, and so I had recently come across a nice article on setting up secure email on both Mac OS X and iOS 5. Since I mostly want S/MIME for email encryption rather than signing (there’s a good overview of the distinction on its Wikipedia article) I decided to just create a self-signed pair rather than procuring a certificate from some annoying, overpaid and insecure centralized certificate “authority” as that article recommends.
Creating a self-signed S/MIME certificate is actually very quick and relatively easy using the Keychain app that comes with Mac OS X, but I wanted to document the process as getting a certificate that Mail recognizes did require overriding at least one of the assistant’s defaults:
Update: Turns out Mozilla Thunderbird will not accept the certificates generated through this process. I’ve had success by creating a standalone personal certificate authority and then using that to sign a user-only certificate. I need to test it a bit more before writing it up here, but it might be a bit simpler process in the end.
-
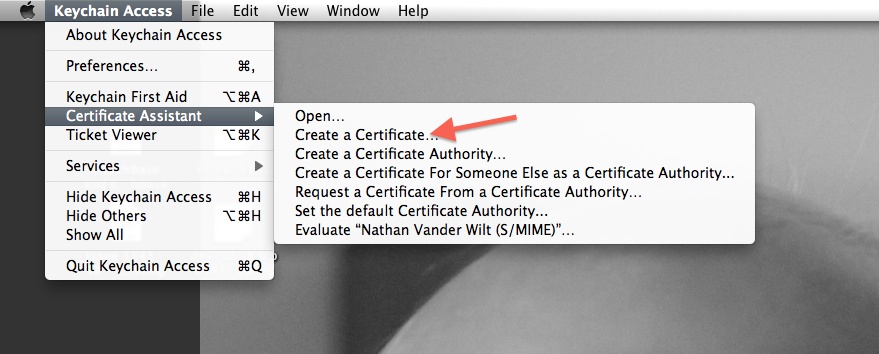
In the Keychain utility application’s menu, choose “Create a Certificate…”:
-
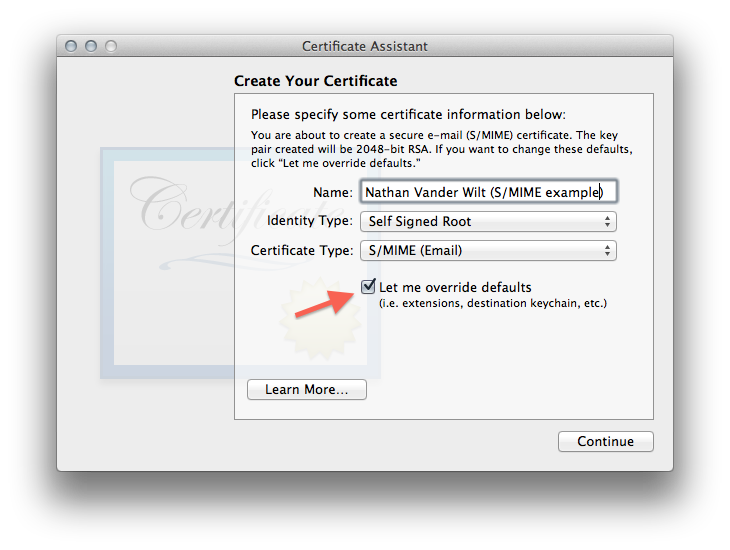
I had to override the defaults primarily so I could include my email address necessary for Mail.app to use it:
- Confirm that self-signed is okay
- I just accepted the default serial number (1) and validity period (365 days)
-
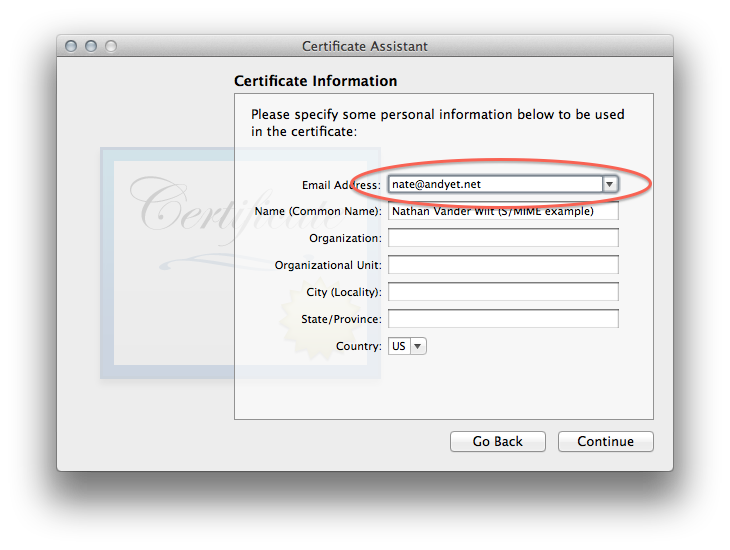
Then the part where you enter (at least) the email address you want to use this certificate with:
-
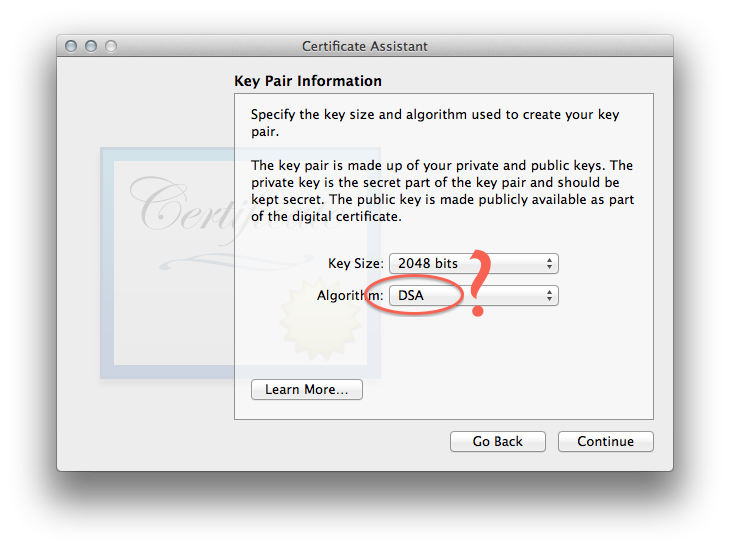
For the actual keypair, I went with DSA mostly just because:
-
I unchecked all the certificate metadata stuff in the next 4 steps, you can try playing with it but didn’t seem worth the complication:
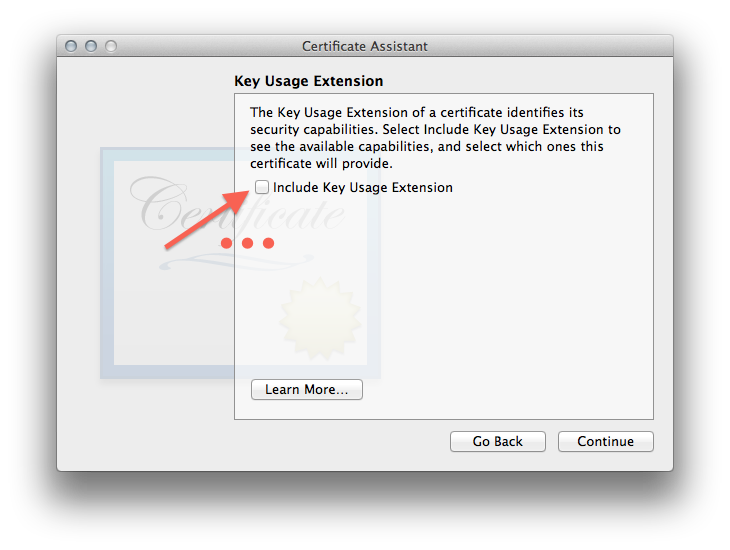
- Then just have the assistant create it in your login keychain unless you have some different setup. It will take a bit to generate the keypair.
-
Once it’s created you’ll need to find the certificate and double click it…
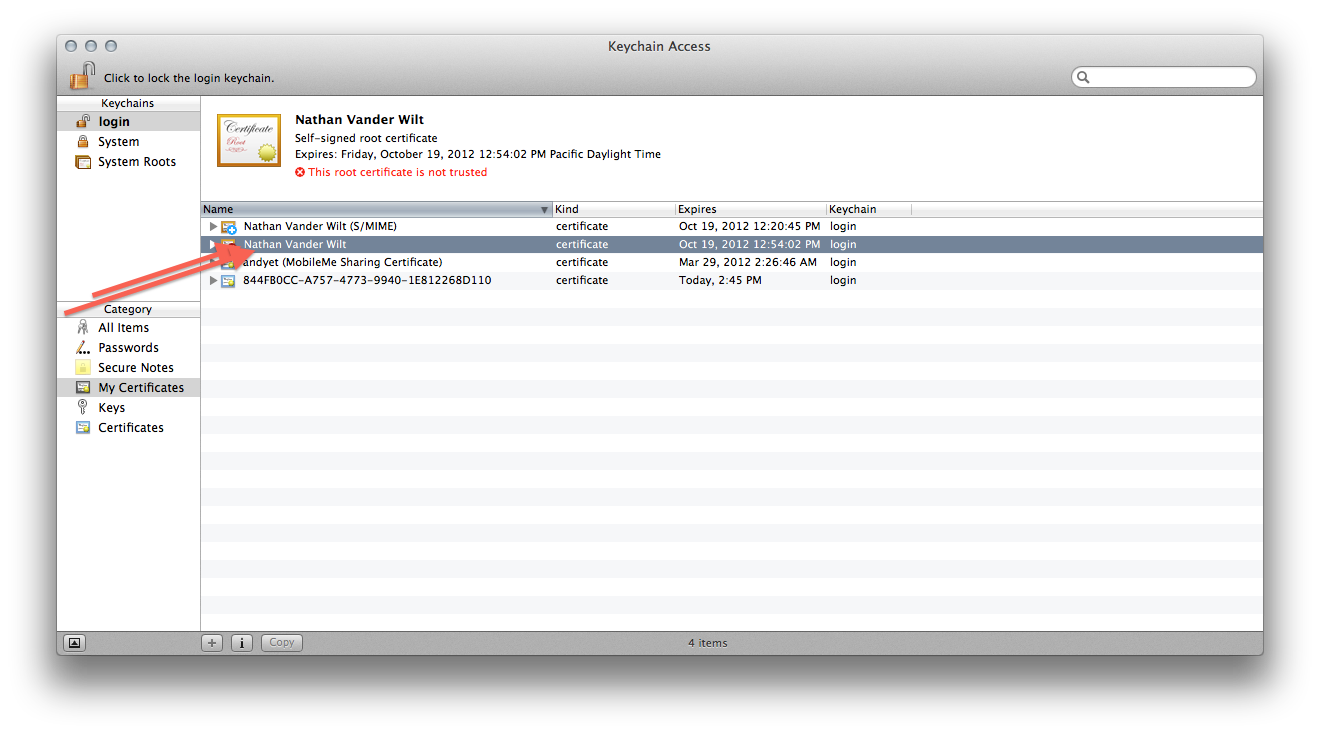
-
…so that you can manually trust it for at least S/MIME:
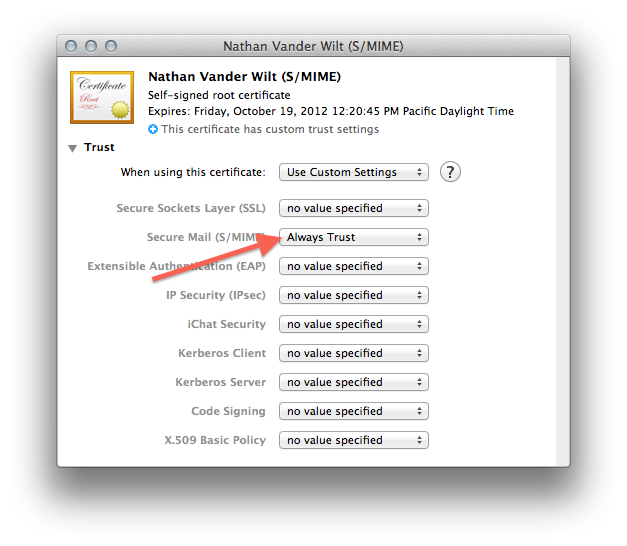
Once you’ve done that, you’ve taken care of the “The Certificate” step and can just follow the rest of the instructions in Ars Technica’s “How to secure your e-mail under Mac OS X and iOS 5 with S/MIME” article using the certificate you created instead of one from some corporation.
There is one major drawback to a self-signed (decentralized) certificate. As you’ve seen yourself after creating your certificate, it will not be trusted by default — only several dozen corporations and governments and rogue nations are trusted to forge certificates; you are not on any platform’s pre-approved issuer list. So: after you give your public key to your email contacts (as will be necessary for them to decrypt your messages) they will have to repeat steps 9 and 10 above to manually trust your self-signed certificate on their own machine.